15 Snowflake Nail Art Ideas That Look Salon-Done (Without the Salon Price)
The most beautiful winter manicure you’ve ever seen didn’t come from a salon — it came from someone who found the right design and ran with it. Snowflake nail art is having a serious moment, and the good news is that whether you’re holding a dotting tool for the first time or you’ve been stamping for years, there’s a look on this list that was made for your hands.
This guide covers 15 of the best snowflake nail art ideas right now — ranging from beginner-friendly stamped designs to editorial-level ombre and chrome finishes. Each one is doable at home, and every single one looks anything but.
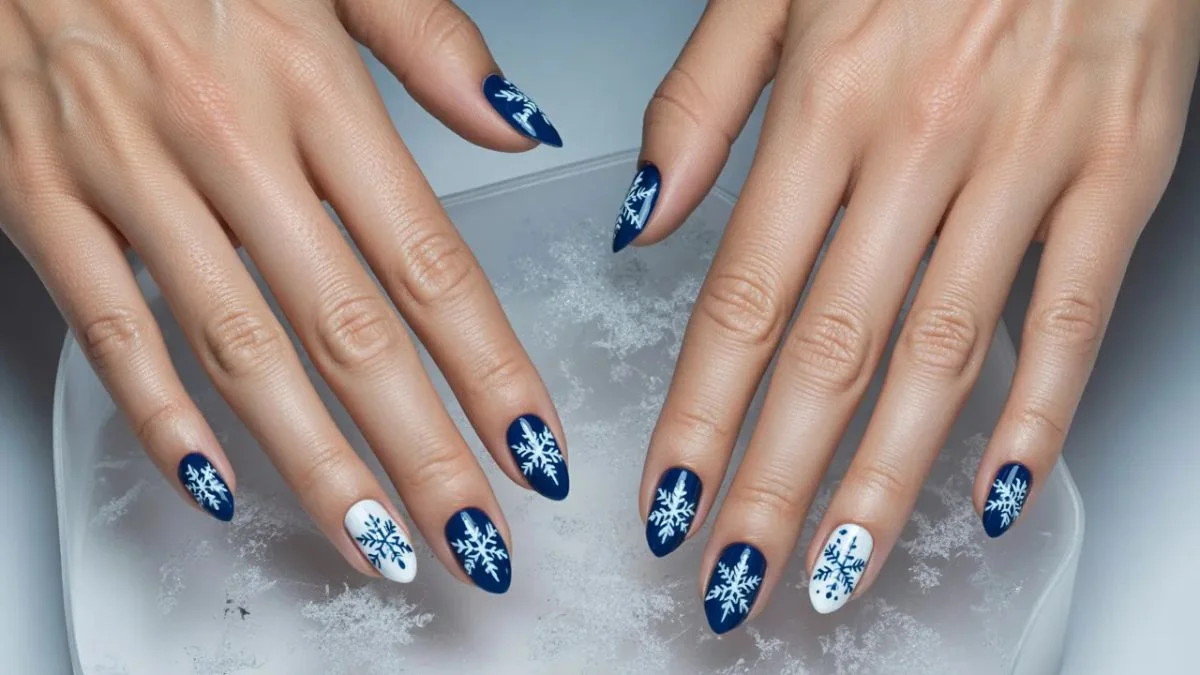
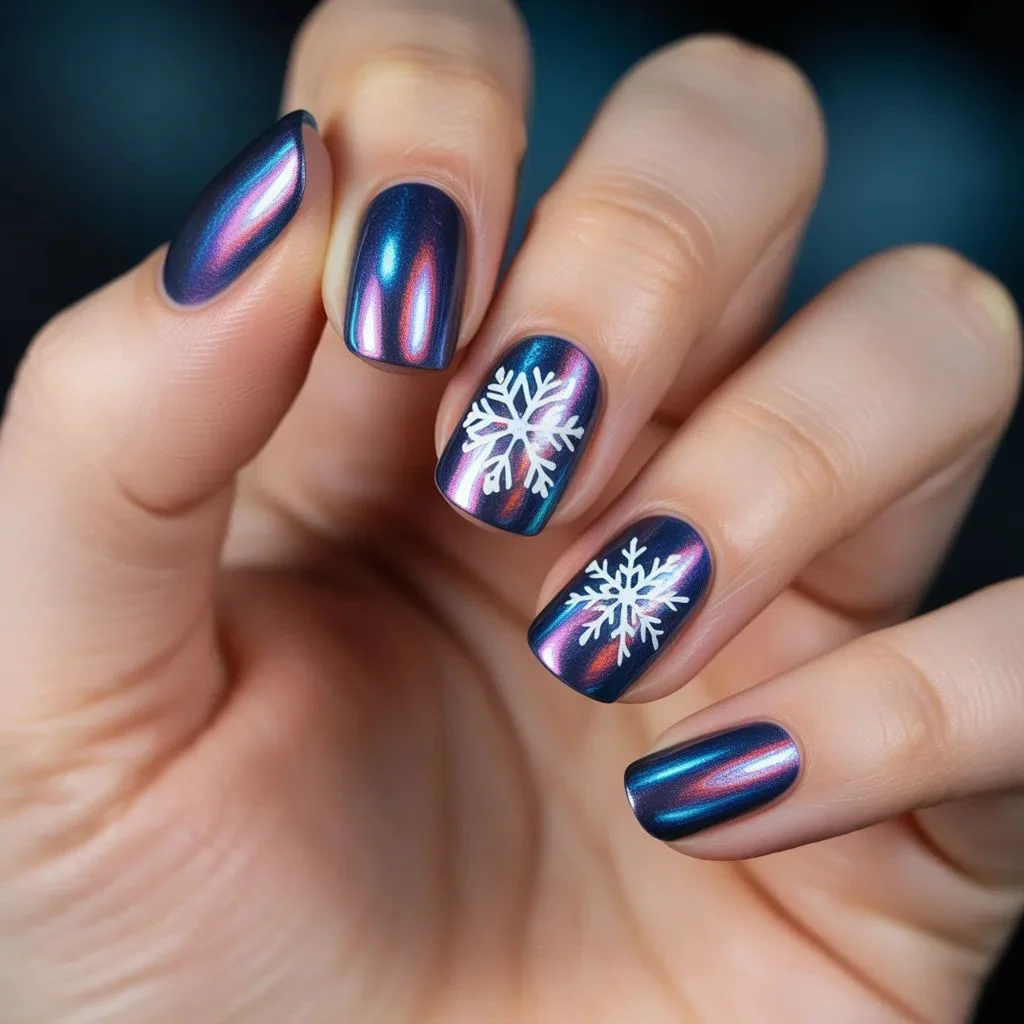
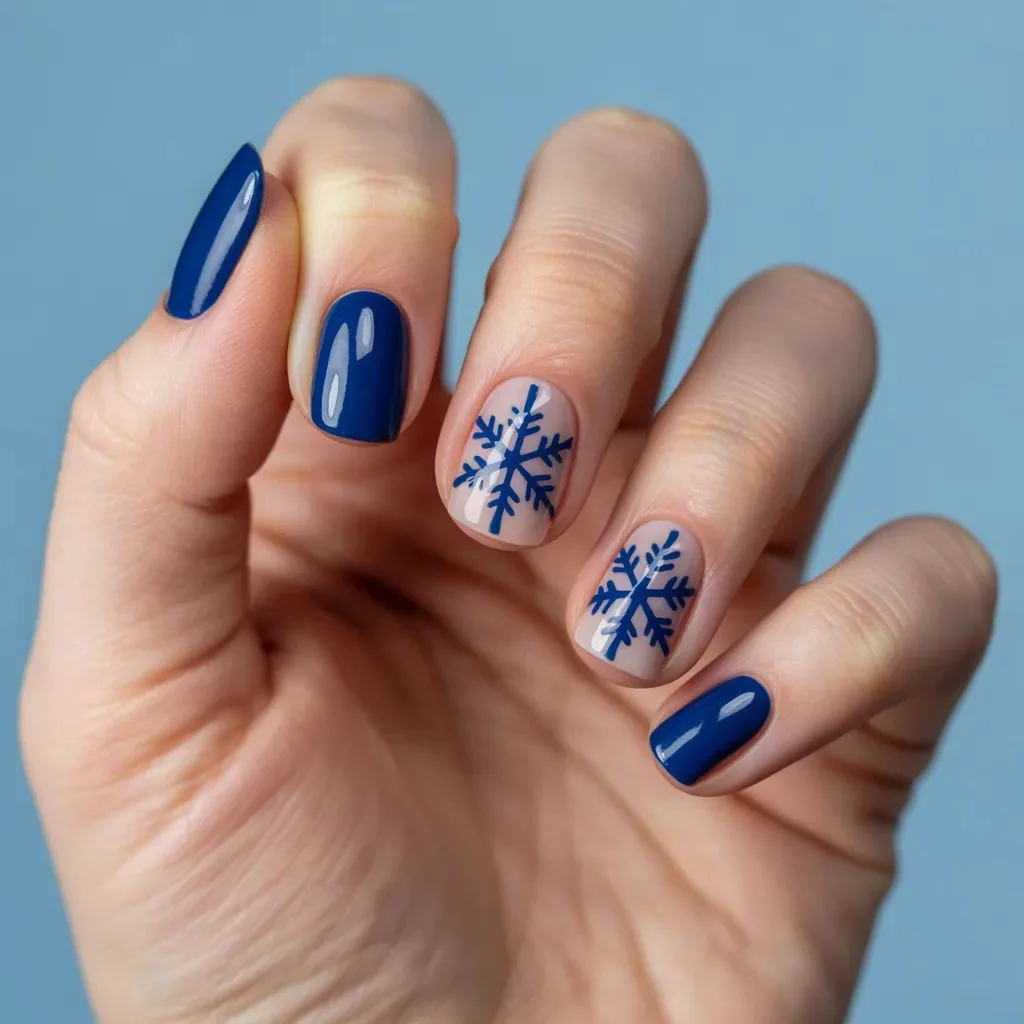
1. Classic White Snowflake on Deep Navy
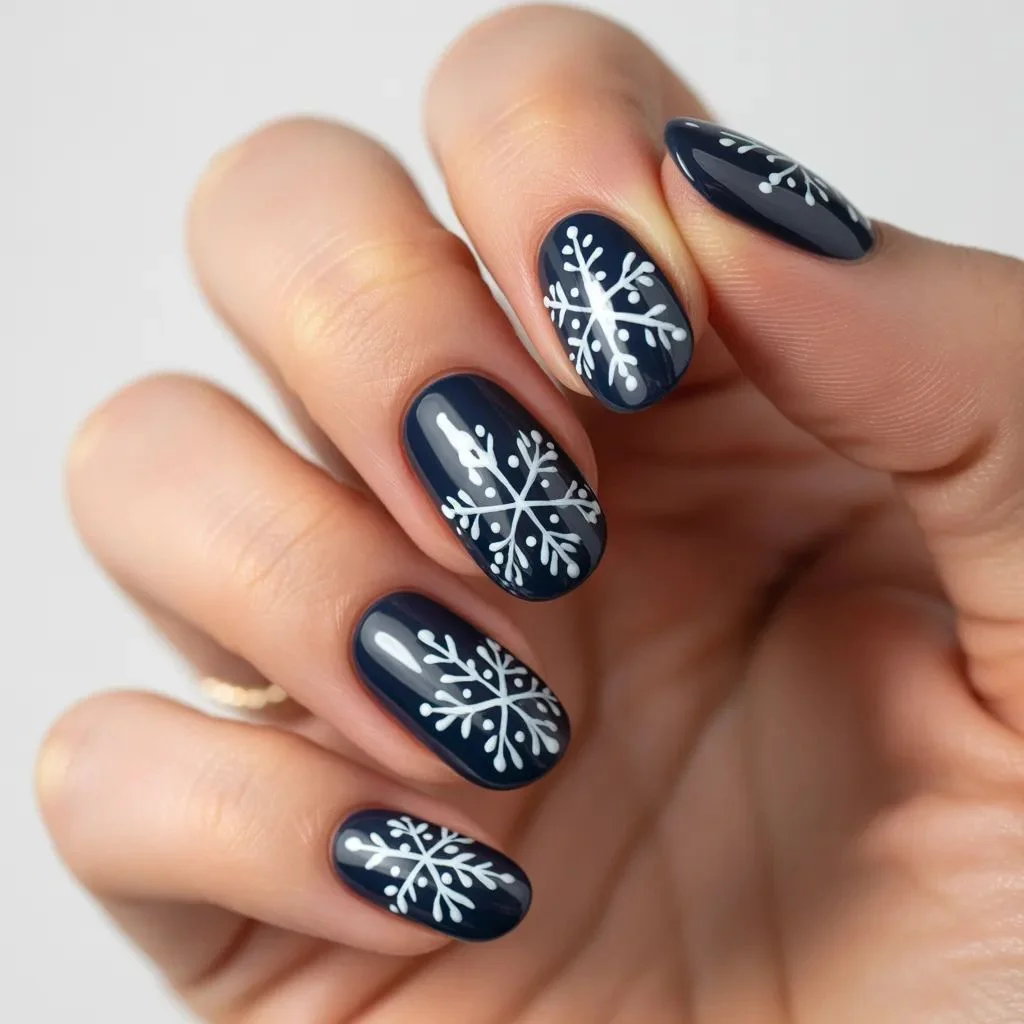
Some nail art ideas are timeless for a reason. A deep navy base with crisp white snowflakes is the winter equivalent of a little black dress — polished, versatile, and always right.
Use a fine nail art brush or a nail stamping plate with a snowflake pattern. Apply two coats of a dark navy polish, let it dry completely, then layer your snowflakes using white nail art gel or acrylic paint. The key is thin, deliberate strokes — snowflakes should look delicate, not heavy.
Finish with a glossy top coat to lock in the design and add that salon-glass effect. This one pairs beautifully with a chunky winter ring or a silver bracelet stack.
2. Minimalist Single Snowflake Accent Nail
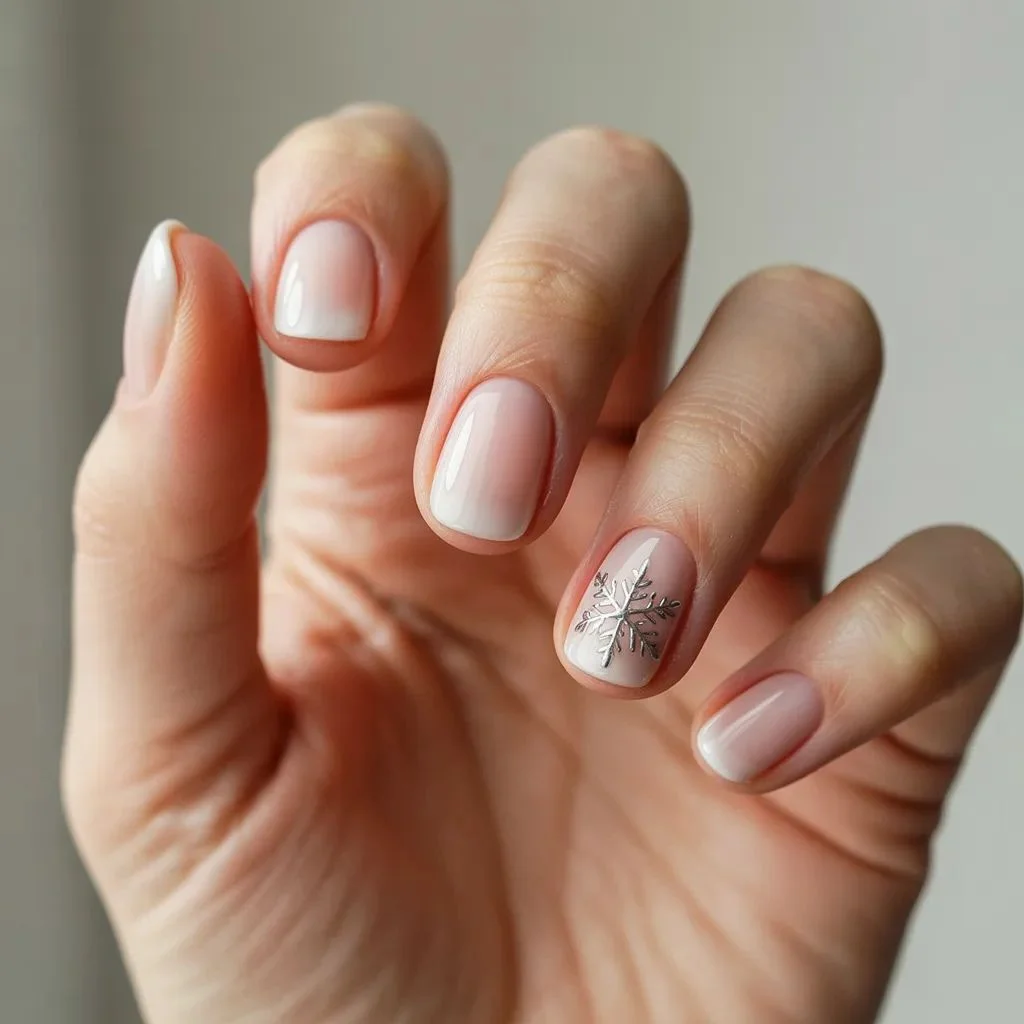
If intricate all-over designs feel like too much commitment, this is your entry point. One snowflake on one nail — usually the ring finger — keeps things subtle while still making a statement.
Paint all nails in a sheer milky white or soft icy grey, then hand-draw or stamp a single snowflake onto your accent nail in silver or white. A nail dotting tool makes this easier than it looks — six dots arranged in a star pattern and two tiny lines through the center is all it takes.
Clean and minimal, this snowflake nail art idea suits any setting, from a work meeting to a winter wedding.
3. Snowflake Stamping on Nude Base
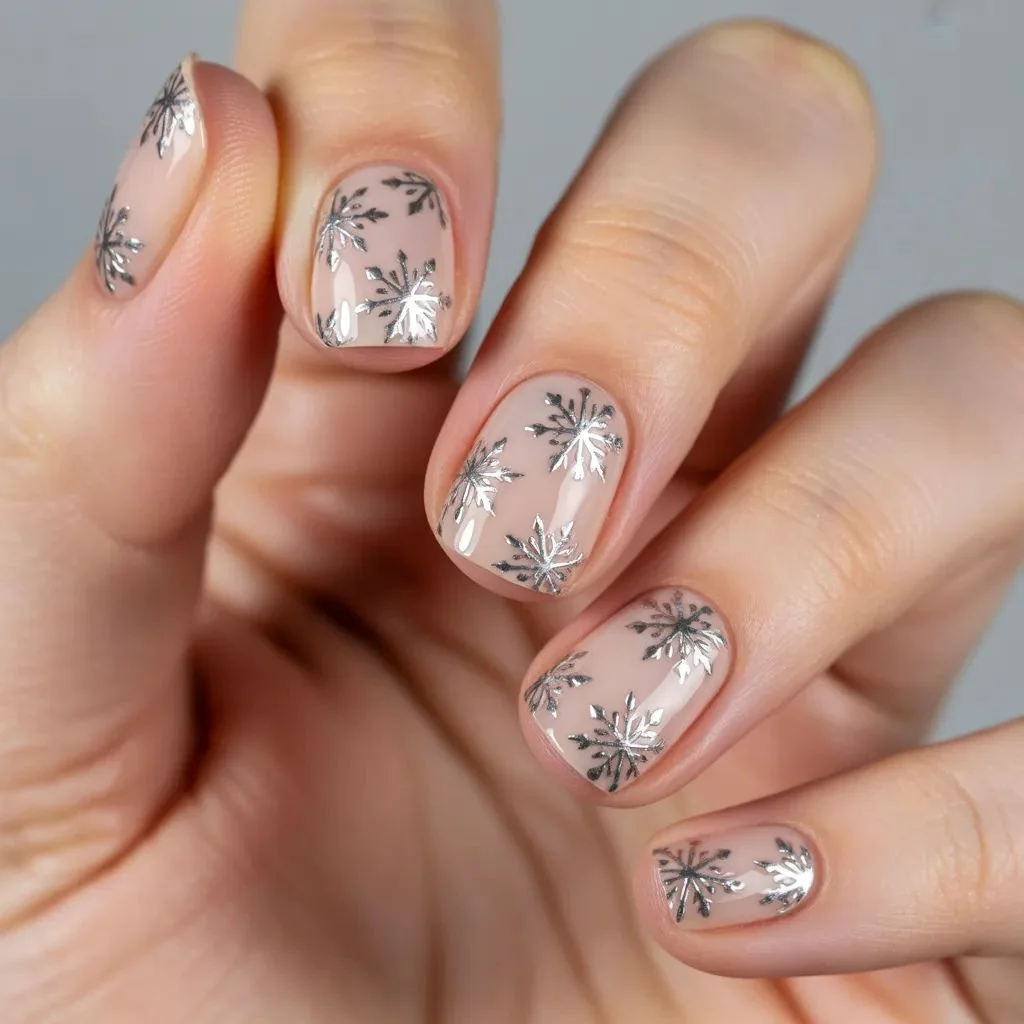
Nail stamping is the shortcut that makes snowflake nail designs look professionally done without the years of practice. Pick up a snowflake stamping plate and a good stamping polish — opacity matters more here than with regular polish.
Start with a sheer nude or warm beige base to let the stamped design pop without being too bold. Stamp in silver or white, then seal everything with a fast-dry top coat before the stamped design has time to smudge.
The result is detailed, even snowflakes across every nail — the kind of pattern that would take an hour to paint freehand done in minutes.
4. Silver Glitter Snowflake Tips

Think of this as the grown-up version of the classic French tip. Instead of white, silver glitter traces the edge of each nail in a crescent shape, then a small stamped or painted snowflake sits just inside the tip.
This works best on shorter nails where the proportions stay balanced. A chunky glitter nail polish works fine, but ultra-fine silver glitter mixed into a clear gel gives you more control over placement and a cleaner finish.
It catches light every time you move your hand — exactly what you want during the holiday season.
5. Icy Blue Ombre with Snowflake Detail
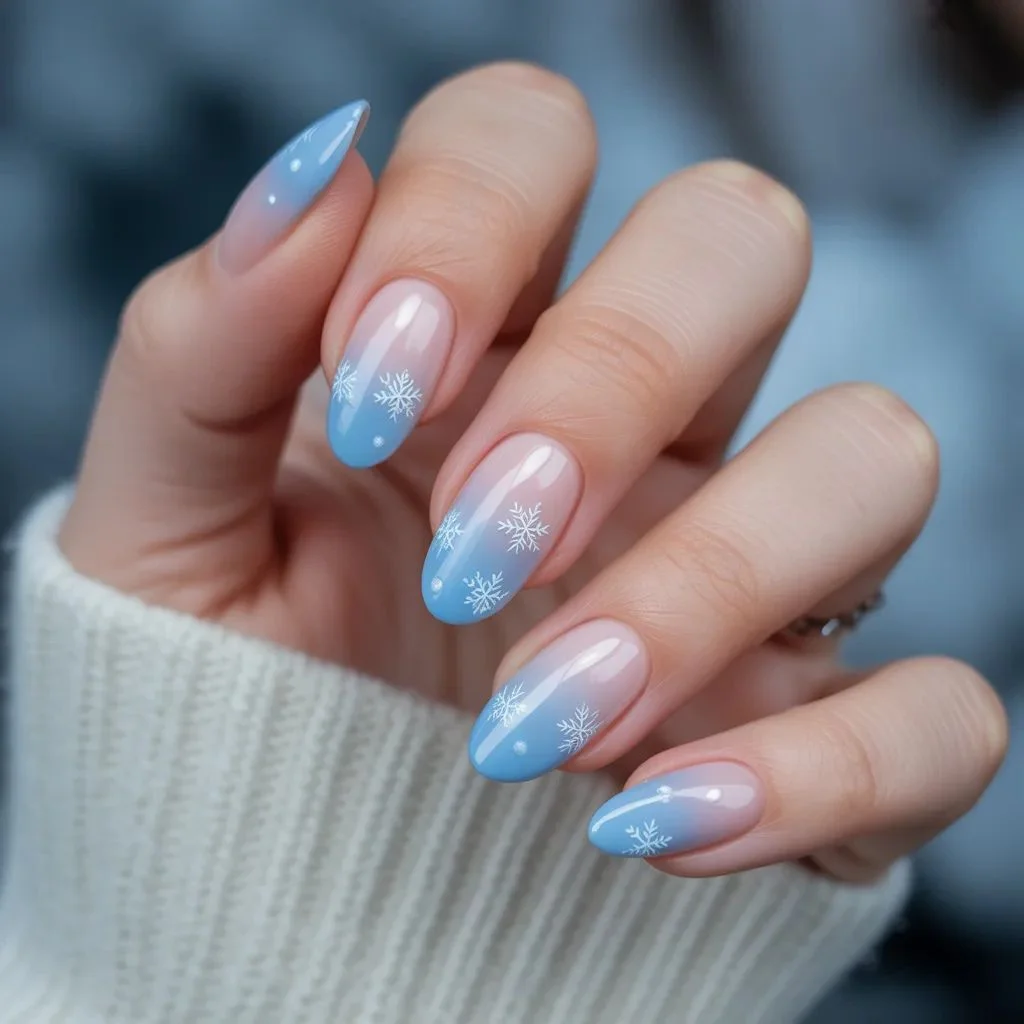
Ombre nails are one of the most searched winter nail designs for good reason — the gradient effect mimics the look of a winter sky fading from deep blue to pale frost.
To nail the gradient at home, apply a medium cornflower blue at the base and blend upward to an icy white at the tips using a makeup sponge. Stipple gently for a soft transition, wipe off the excess on your skin, then stamp or paint small snowflakes in white over the lightest section.
Top with a matte finish for a frosted look or stay glossy for something more polished. Either way, this is one of those snowflake nail designs that photographs beautifully.
6. Snowflake French Tip
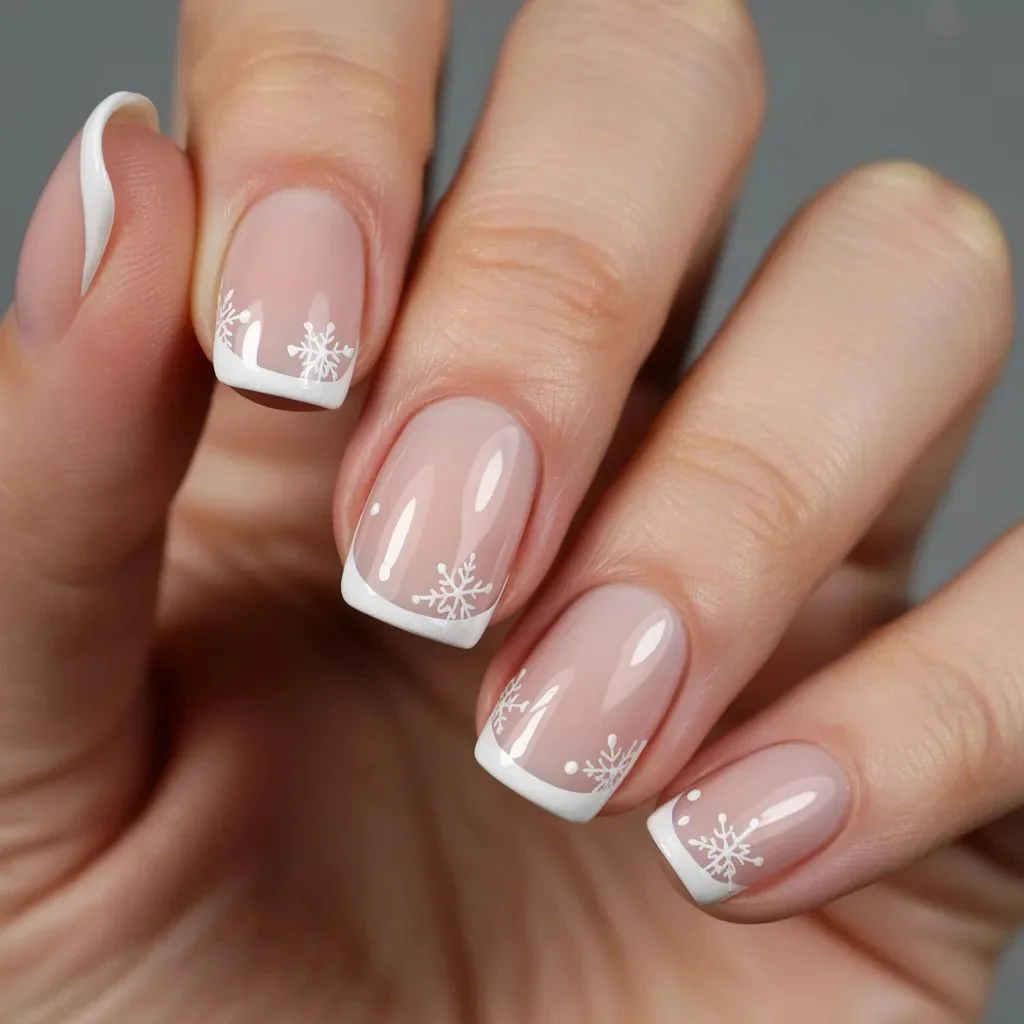
The snowflake French tip takes the traditional French manicure and trades the white line for a row of miniature snowflakes. It’s an idea that sounds simple and executes beautifully.
Start with a sheer or nude base, then use a fine detail brush to paint tiny snowflake outlines in white or silver along the smile line of each nail. No two snowflakes have to match exactly — slight variation makes it look more hand-crafted and intentional.
This is a go-to look for anyone who wants holiday nails that can still transition smoothly into a professional setting.
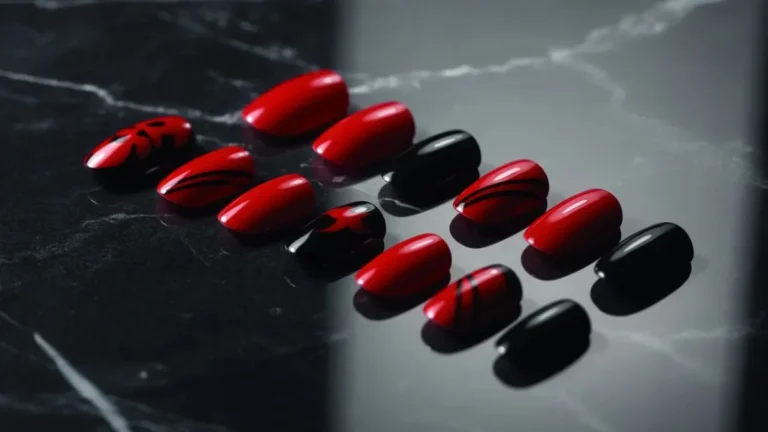
7. Black and White Graphic Snowflakes
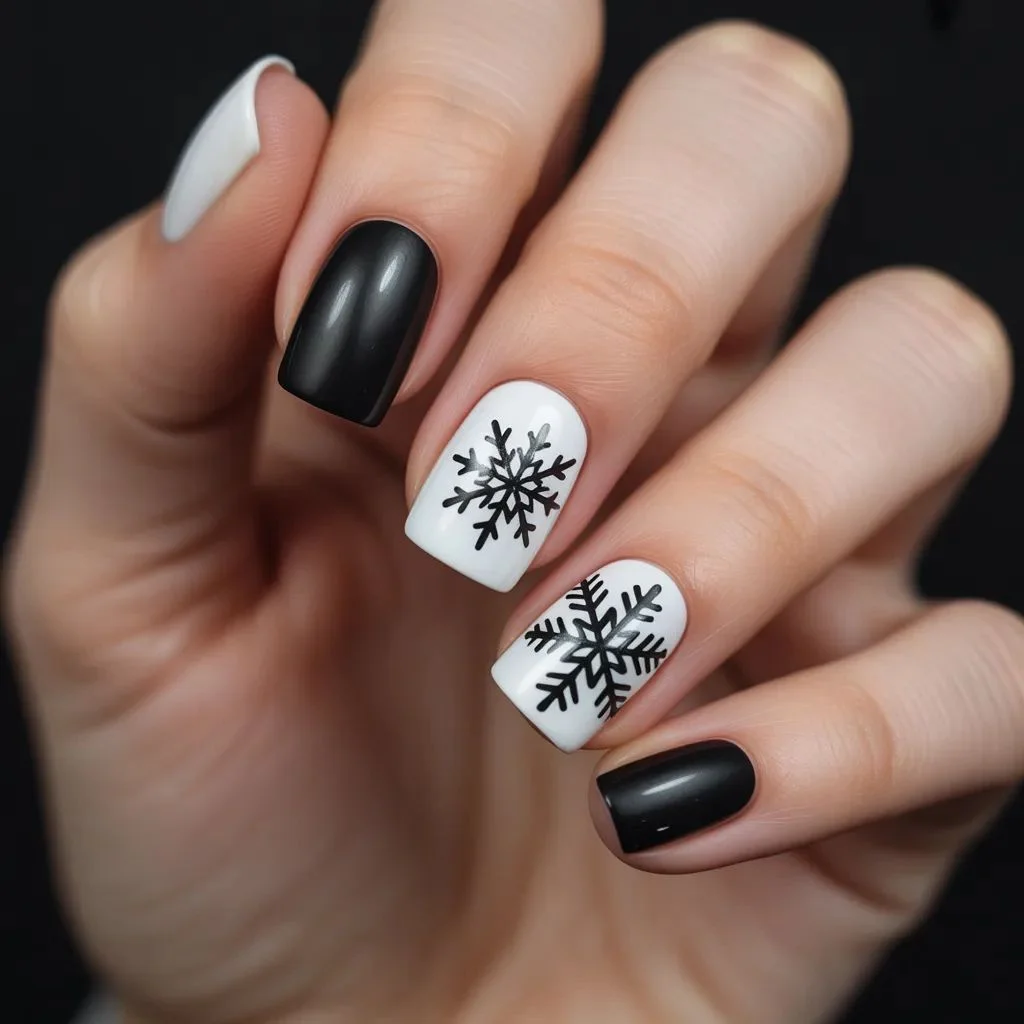
This is snowflake nail art with an editorial edge. High-contrast black and white graphics feel more fashion-forward than festive — which is exactly what makes them so wearable all winter long, not just at Christmas.
Alternate nails between a matte black base and a crisp white base. On the black nails, stamp large graphic snowflakes in white. On the white nails, do the reverse with black. The result is a bold, intentional look that pairs with almost any winter outfit.
Skip the topcoat on the black nails for a matte finish and add a glossy coat to the white ones — the texture contrast adds another dimension to the design.
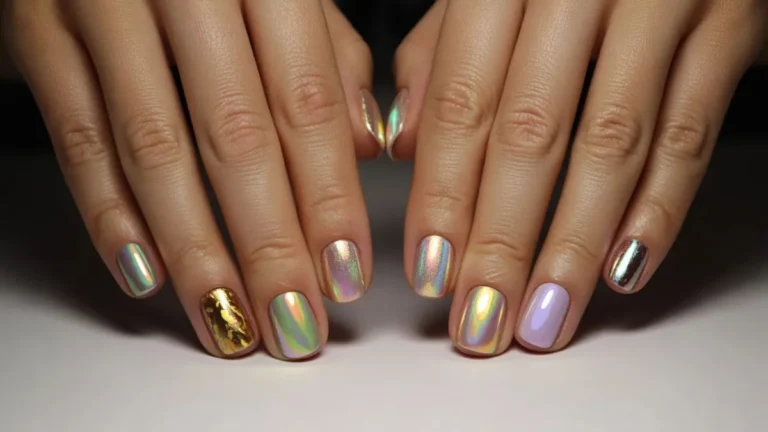
8. Holographic Chrome Snowflake
If you want people to stop and ask about your nails, this is the design that does it. Holographic chrome powder applied over a gel base creates a mirror-like finish that shifts color in the light — then delicate snowflakes in white or silver sit on top like frost on glass.
You’ll need a gel lamp and chrome powder for this one, but the investment is worth it. Apply the chrome powder over a cured gel black or deep blue base using a silicone brush, cure again, then add your snowflake detail in gel paint and cure once more.
The finished nail catches every angle of light — genuinely one of the most eye-catching snowflake nail designs on this list.
9. Red Plaid with Snowflake Accent
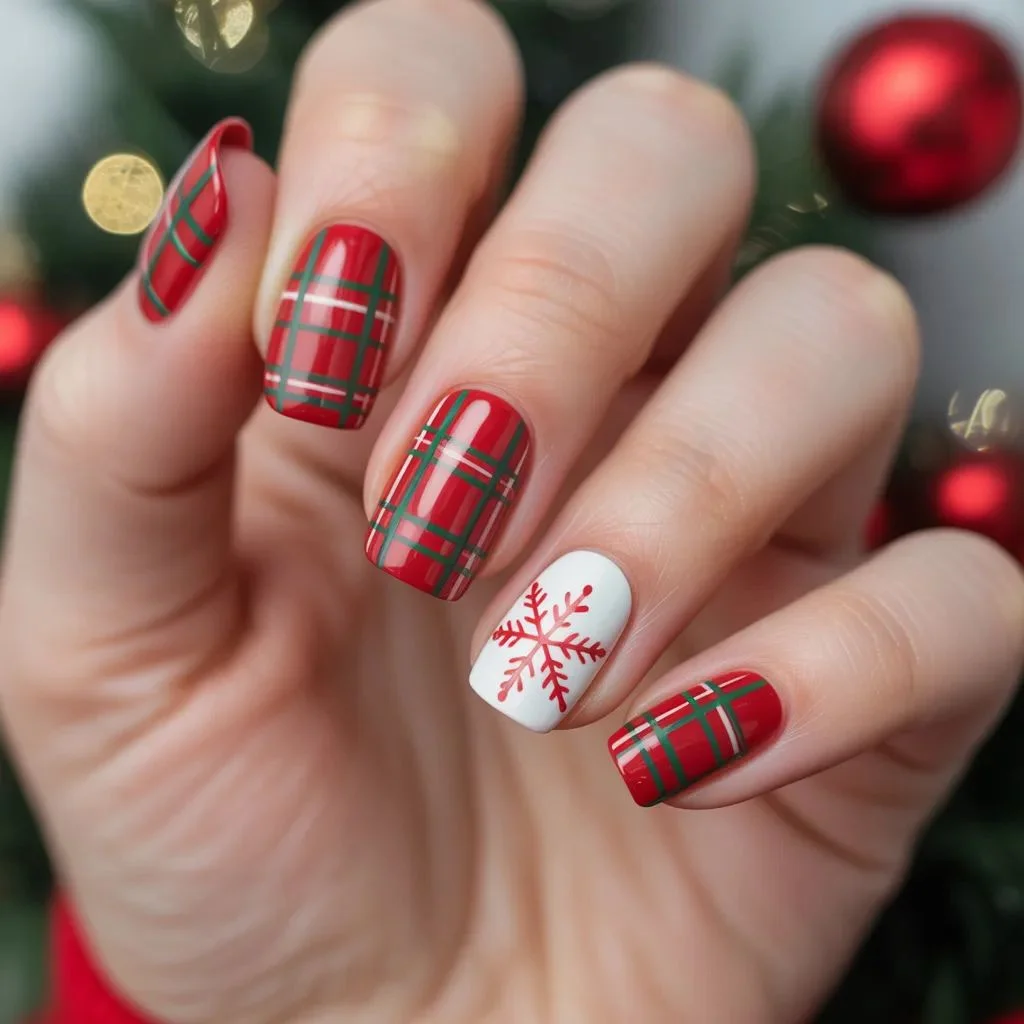
Red plaid nails are a winter staple on their own. Add a snowflake accent nail and you’ve created a full holiday story across ten nails.
Paint two or three nails with a classic red plaid — thin white and green lines crossing over a red base. Leave one or two nails (ring finger and thumb work well) as a solid red or white base, then paint or stamp a single detailed snowflake in white or gold.
This combination reads festive without being costume-y, which is the sweet spot for Christmas nail ideas that feel genuinely stylish.
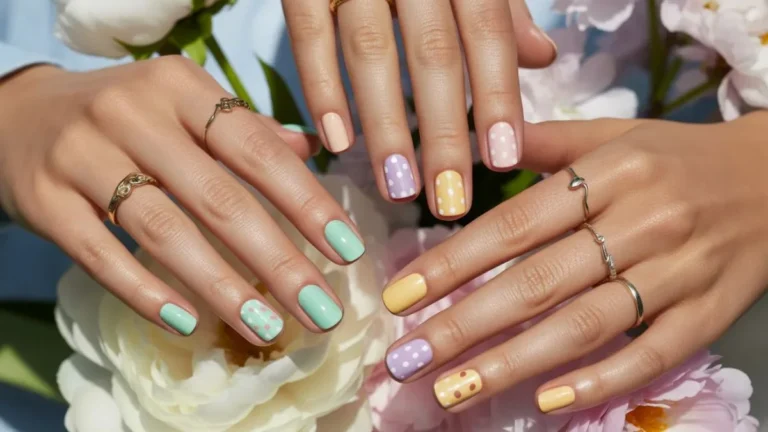
10. Pastel Snowflake Nail Art
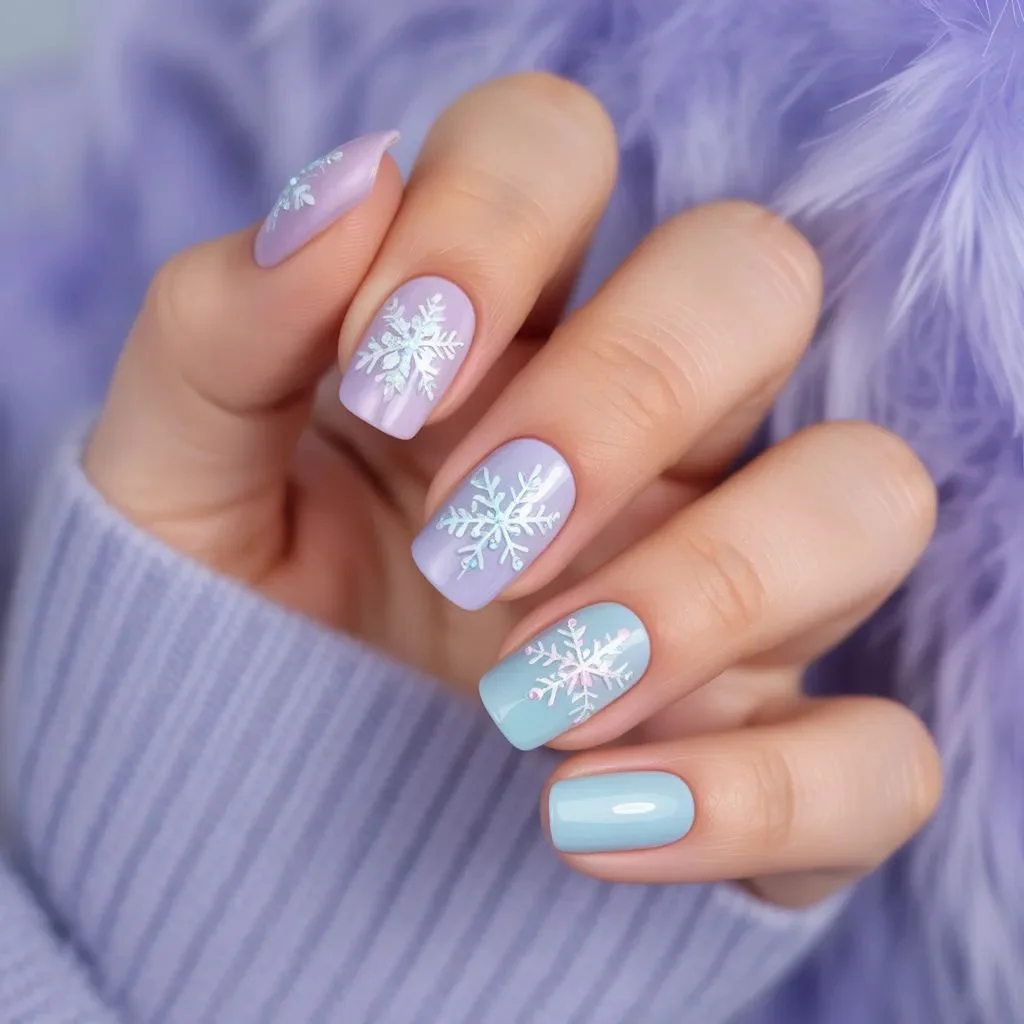
Winter nail art doesn’t have to be dark. Pastel snowflake designs — think dusty lavender, powder blue, and soft mint — bring something unexpected to a season that defaults to navy and burgundy.
Paint each nail in a different soft pastel shade and top each one with a white snowflake stamp or a hand-drawn snowflake in iridescent nail gel. The iridescent finish gives the snowflakes a slight shimmer that works perfectly against the muted base colors.
It’s a lighter, dreamier take on the winter manicure — great for anyone who likes to stand out without going bold.
11. Negative Space Snowflake Design
Negative space nails use your bare nail as part of the design. For negative space snowflake nail art, the snowflake shape itself is left unpainted while the surrounding nail is filled with color — creating a reverse silhouette that’s completely modern.
This works best in gel. Apply color around a snowflake stencil (you can find these online or cut them from scotch tape), remove the stencil carefully before the gel cures, then top with a glossy or matte finish.
Ice blue, deep plum, and forest green all look incredible against the natural nail beneath. This is the DIY nail art idea for anyone who wants a design that looks intentional and architectural.
12. Rose Gold and White Snowflakes
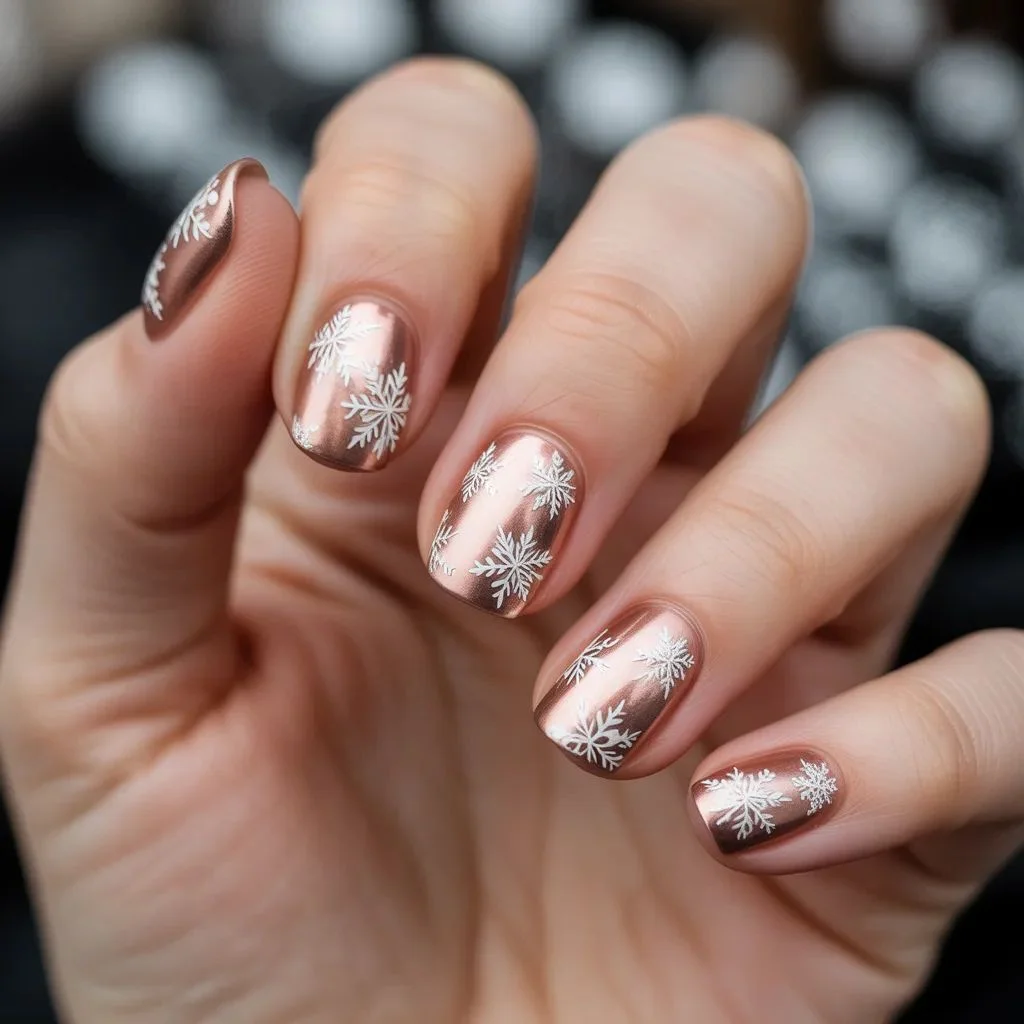
Rose gold brings warmth to winter nail art that cooler silvers and blues can’t. A rose gold base with white snowflake detail is soft, romantic, and genuinely flattering on every skin tone.
Use a rose gold foil or metallic gel polish as your base, then stamp or paint small snowflakes in pure white across each nail. The contrast between warm rose gold and bright white creates a look that photographs like something from a jewelry campaign.
Add a single clear rhinestone to the center of a few snowflakes for a subtle extra dimension — this is the design you want for a winter engagement party or holiday dinner.
13. Snowflake Gel Art with 3D Effect
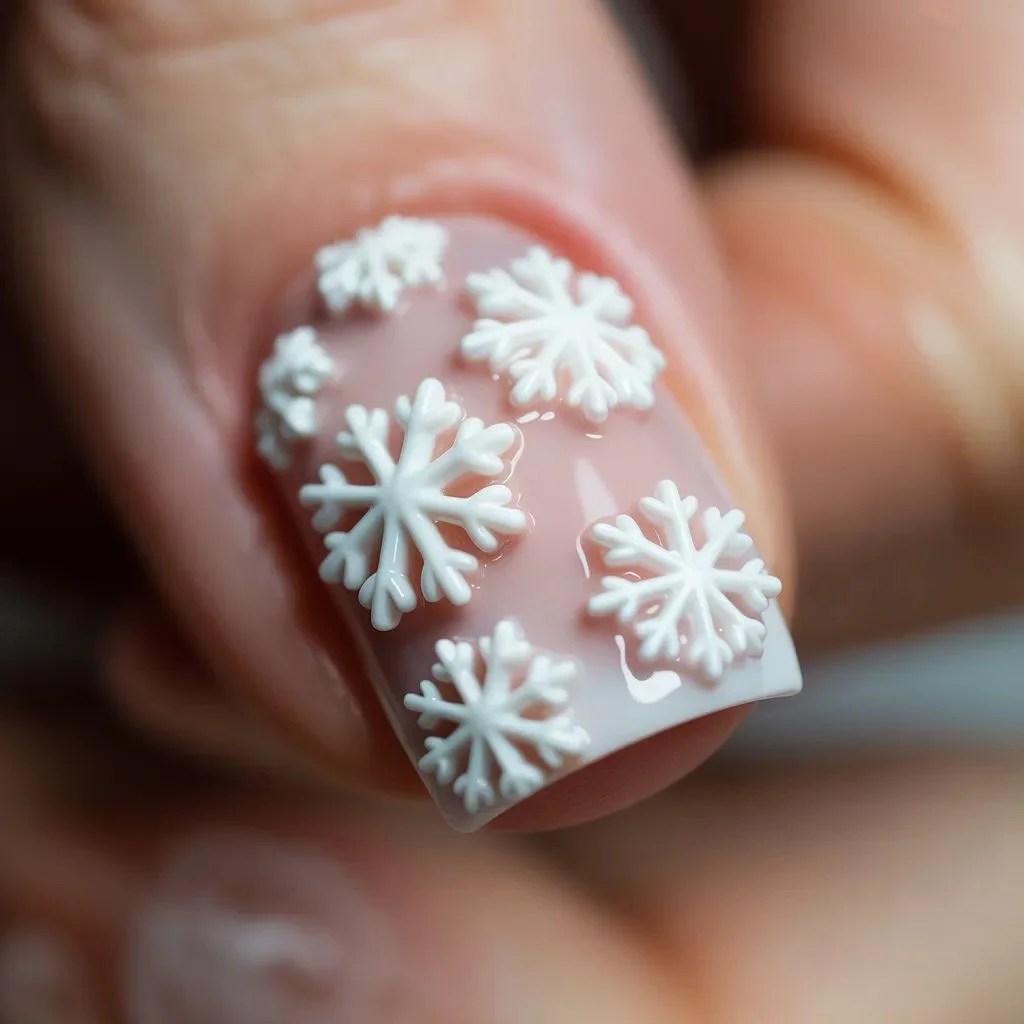
This one raises the bar. 3D snowflake nail art uses gel or acrylic to build snowflake shapes that sit above the nail surface — adding texture and depth you can feel as well as see.
Use a thick builder gel or hard gel and a fine nail brush to draw each arm of the snowflake, layering gel to build thickness. Cure between layers to maintain control of the shape. When it’s complete, you’ll have a raised snowflake that catches light from every angle.
It’s a more advanced technique, but it’s entirely learnable at home with practice. The payoff is a manicure that looks like gel nail art straight from a high-end nail salon.
14. Dark Burgundy with Delicate Snowflakes
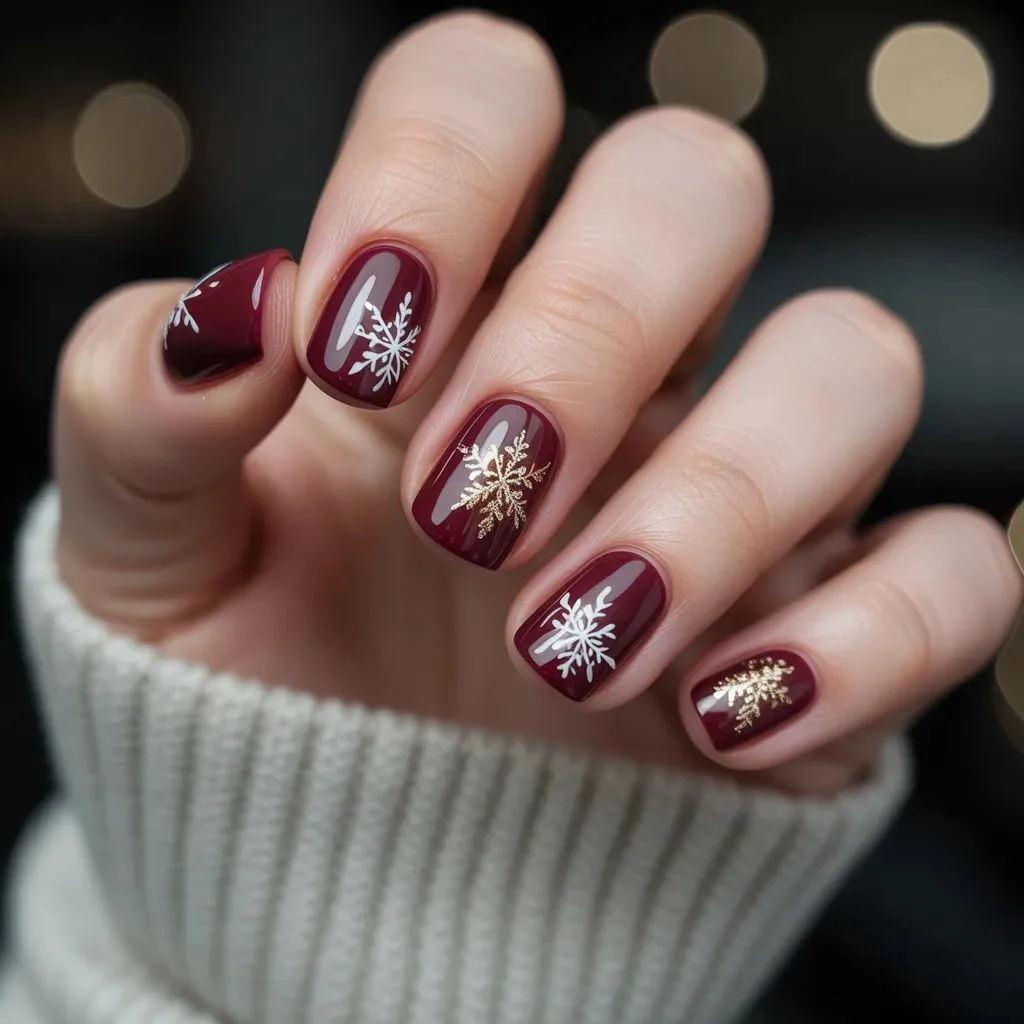
Burgundy is the unexpected perfect canvas for snowflake nail designs. The depth of the color makes white and gold snowflake details pop the same way stars show up against a dark sky.
Apply two coats of a rich burgundy or deep wine polish, let it cure completely, then use a thin nail art brush to draw small, delicate snowflakes in white or gold nail gel. Keep the snowflakes small and spaced — this is a design that rewards restraint.
Seal with a glossy topcoat and you’ve got a set of winter nail designs that works equally well for a holiday party and a quiet weekend in.
15. Snowflake Watercolor Nails
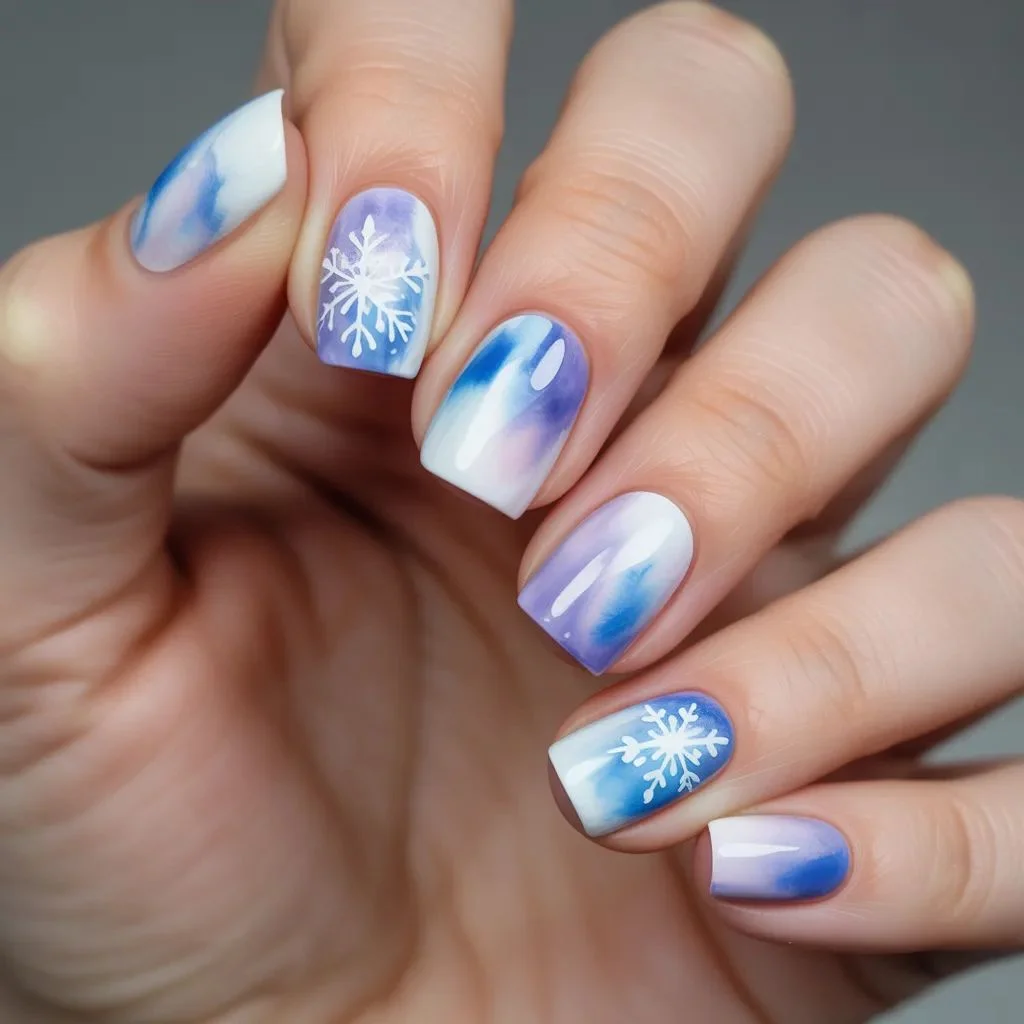
Watercolor nails look like small paintings. Using sheer, diluted nail polishes or watercolor nail gel, you can create soft washes of blue, lavender, and white that blend into each other — then add snowflake nail art detail in white or silver on top.
The technique is more forgiving than it looks. Apply your lightest color first as a base, then drop small amounts of deeper shades and blend them with a fine brush while still wet. The uneven, soft edges are the point — they’re what makes the watercolor effect so striking.
Finish with snowflakes stamped or hand-drawn over the dried watercolor layer. Seal with a glossy top coat. This is the snowflake nail art idea that looks like wearable art.
Learn More
For step-by-step nail stamping technique, Nailpro’s beginner guide to nail stamping walks through everything from plate prep to top coat application.
If you’re building your at-home kit, the CND Education nail art tutorials are a reliable resource for gel technique and tool recommendations.
Your Winter Nails Are Waiting
There’s no single way to do snowflake nail art — and that’s exactly what makes it such a satisfying challenge. Whether you stamp a clean graphic design onto a nude base or build intricate 3D gel snowflakes from scratch, the look you create at home can be just as striking as anything you’d find on a salon menu.
Start with the idea that matches your current skill level, grab the right tools, and give yourself permission to practice on a piece of plastic before you commit to your actual nails. The technique matters far less than the patience you bring to it.
Our Pick: Maroon Nails Design Ideas That Go From Boardroom to Date Night.
Pick your favorite design from this list and share it — winter nails are too good to keep to yourself.